Every home cook faces a big challenge: making crispy chicken tenders. They should be golden, crunchy, and super tasty. I remember my grandmother’s first time frying chicken tenders. Her hands moved with skill, making a coating so crisp it echoed in the kitchen.
Crispy chicken tenders are more than food; they’re a way to bring families together. Whether it’s a quick dinner or a weekend party, making crispy fried chicken tenders can make any meal special.
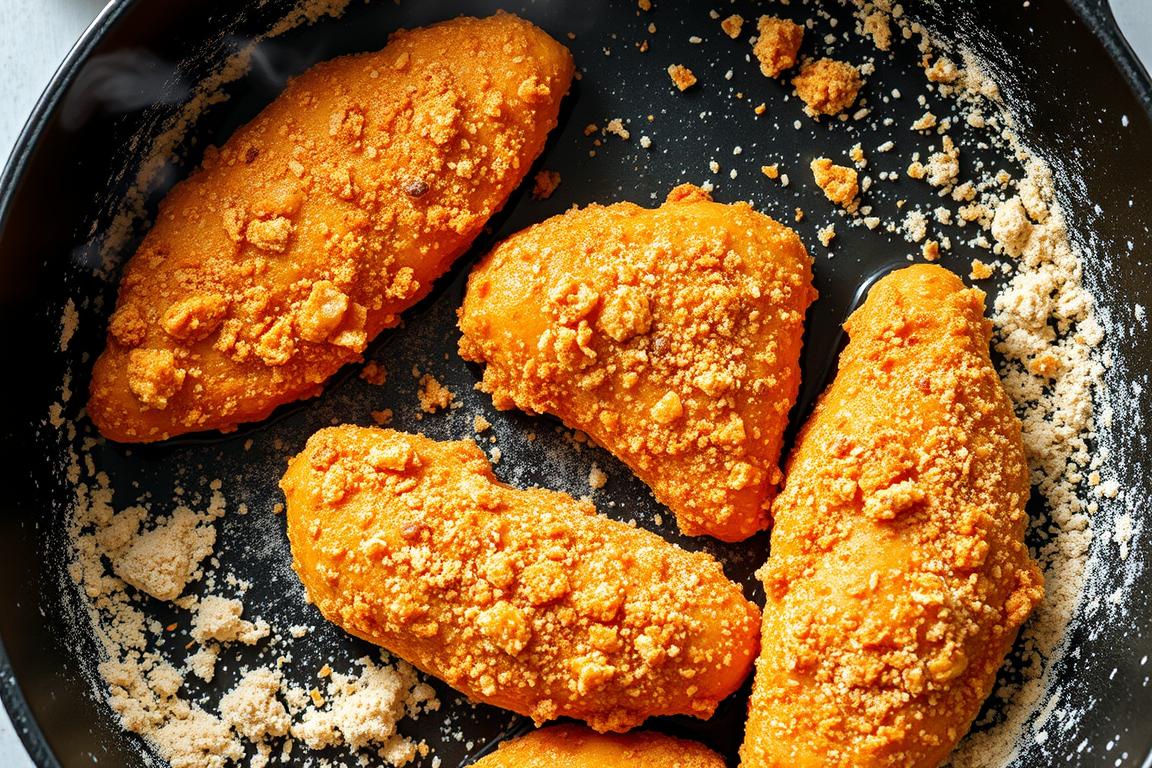
In this guide, you’ll learn how to make the tastiest, crunchiest chicken tenders. We’ll cover everything from choosing the right ingredients to the best frying method. You’ll be making restaurant-quality crispy chicken tenders at home in no time.
Understanding Chicken Tenders vs Chicken Breasts
Knowing the difference between chicken tenderloins and chicken breasts can make your cooking better. These two cuts might look similar, but they taste and feel different. This can change how your dish turns out.

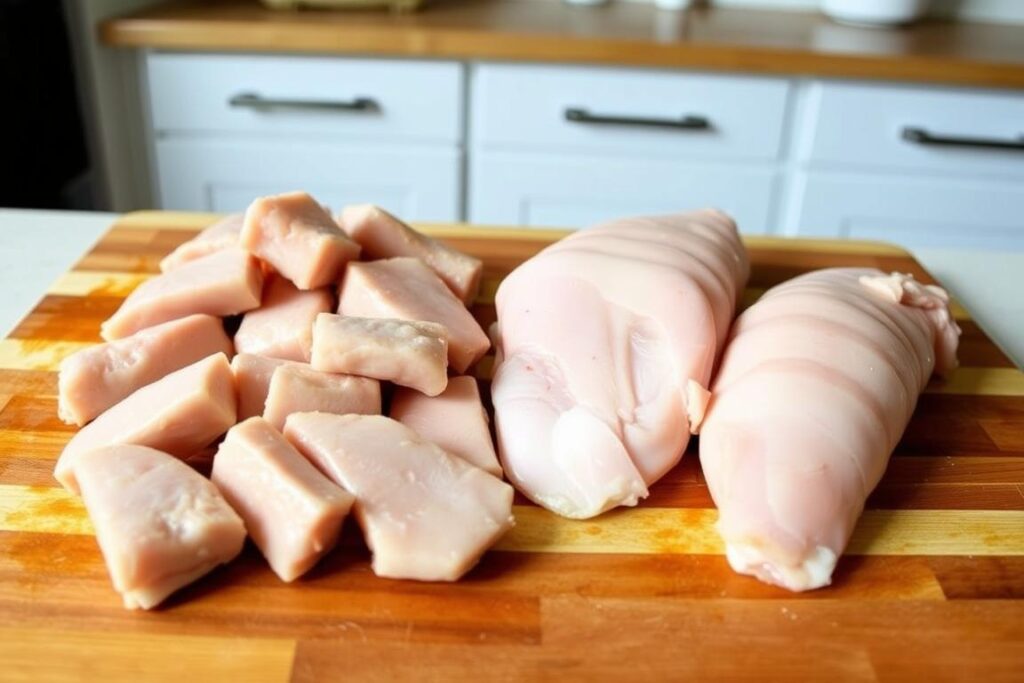
Identifying True Chicken Tenderloins
Chicken tenderloins are smaller and more delicate than chicken breasts. They are:
- Shorter and thinner than chicken breasts
- More tender in texture
- Lighter in color
- Attached to the underside of chicken breasts
Benefits of Using Real Tenderloins
Choosing real chicken tenderloins has many benefits:
- Superior tenderness compared to chicken breast strips
- Faster cooking time
- More consistent texture
- Enhanced flavor absorption
“The secret to perfect chicken tenders lies in understanding the unique qualities of each cut.” – Professional Chef
Proper Preparation Techniques
For great chicken tenders, you need to handle and prepare them right. If you use chicken breasts, cut them into strips about ½-inch thick. Always remove the tendon from chicken tenderloins with a fork and your hands for extra tenderness.
| Cut | Weight Range | Cooking Time |
|---|---|---|
| Chicken Tenderloins | 1 – 1½ pounds | 12-15 minutes |
| Chicken Breasts | 1½ – 2 pounds | 15-20 minutes |
Remember, chicken must be cooked to 165°F for it to be safe to eat. Good seasoning and preparation are crucial for tasty, tender chicken every time.
Essential Ingredients for Ultra-Crispy Chicken
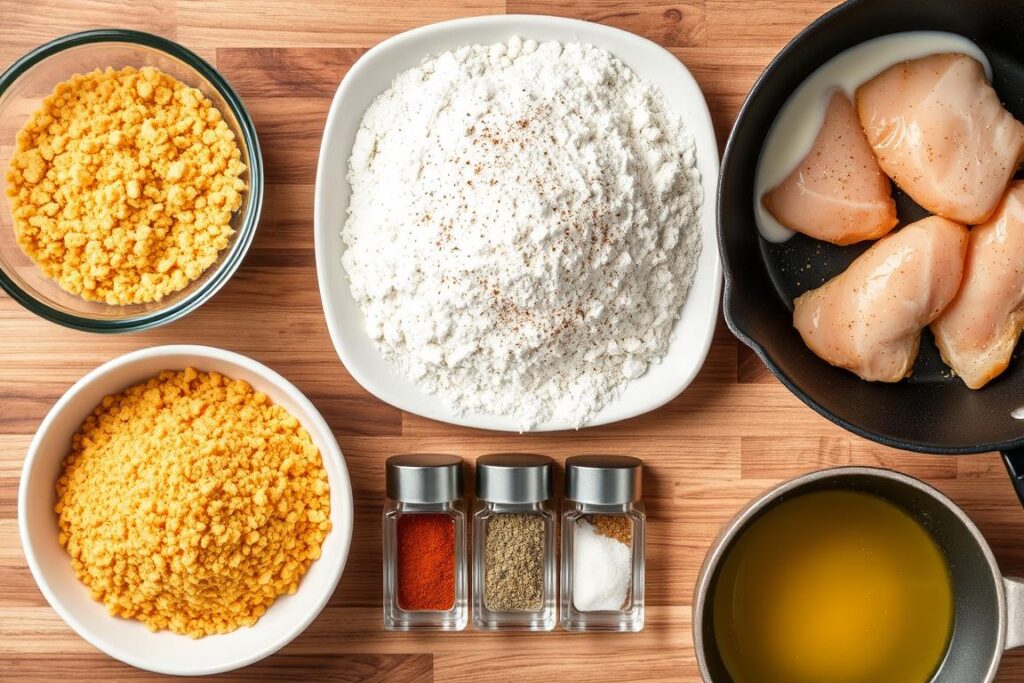
To make perfect crispy chicken tenders, you need more than just flour. The right ingredients can turn a simple dish into a crunchy masterpiece. Learning about flour for crispy chicken can improve your cooking.

Starting your journey to ultra-crispy chicken means picking the right starches. Professional chefs know that not all flours are the same. The key is in choosing the right mix of ingredients.
- All-purpose flour: The foundation of your coating
- Potato starch: Creates a rigid, brittle batter
- Cornstarch: Prevents gluten development
- Baking powder: Generates tiny air bubbles for extra crunch
“The perfect crispy chicken is a delicate balance of ingredients and technique.” – Professional Chef
Now, let’s look at the best ingredient ratios for crispiness:
| Ingredient | Percentage | Purpose |
|---|---|---|
| All-purpose flour | 50% | Base coating |
| Potato starch | 25% | Creates crunch |
| Cornstarch | 25% | Prevents gluten |
The 1:1 flour-to-potato starch ratio is key for a crispy exterior. By choosing and mixing your starches carefully, you’ll get a coating that’s light, crunchy, and tasty.
The Perfect Seasoning Blend for Maximum Flavor
Making a tasty chicken tender seasoning is like an art. It turns simple chicken into a dish that wows everyone. The right mix of spices can make your cooking stand out, making your chicken tenders a hit.
To make the perfect seasoning, you need to know how to mix flavors. Start with basic spices that go well with chicken. This will be the base of your seasoning.
Base Seasonings and Measurements
Here are the key spices you should use:
- 2 tablespoons kosher salt
- 1 tablespoon black pepper
- 1 tablespoon garlic powder
- 1 tablespoon onion powder
- 2 teaspoons paprika
- ½ teaspoon cayenne pepper
Optional Flavor Enhancers
For more interesting flavors, try these spices:
- Dried herbs like thyme or oregano
- Smoked paprika for deeper flavor
- Cumin for an earthy note
- Dried mustard powder
Creating Custom Spice Blends
Try new things with your chicken seasoning. Start small and adjust to taste. This way, you can make unique flavors.
| Flavor Profile | Recommended Additions |
|---|---|
| Spicy | Extra cayenne, red pepper flakes |
| Herbal | Dried rosemary, basil |
| Smoky | Chipotle powder, smoked paprika |
The secret to great chicken tenders is not just in the cooking technique, but in the carefully crafted seasoning that makes each bite memorable.
Season your chicken before dredging for the best flavor. Your homemade spice blend will turn simple chicken tenders into a dish everyone will love.
How do I ensure the chicken tenders stay crispy?
To keep chicken tenders crispy, you need a few key steps. It’s all about how you prepare and cook them. This way, you get that perfect crunch and texture.
Here are some top tips for crispy chicken tenders:
- Create a textured dredging mixture by combining different dry ingredients
- Use a combination of flour and starches for optimal coating
- Let breaded tenders rest before frying to help the batter adhere
- Implement the double-frying method for extra crispiness
Start with your dry coating. Drizzle water into your flour mixture and rub it together. This makes the coating craggly and uneven. It’s what gives chicken tenders their irresistible crispy edges.
“The secret to crispy chicken is all in the preparation and coating technique.” – Professional Chef
Set up your dredging station with layers to keep things crispy:
| Layer | Purpose | Recommended Ingredients |
|---|---|---|
| First Layer | Moisture Barrier | Buttermilk or Egg Wash |
| Second Layer | Primary Coating | Seasoned Flour Mixture |
| Final Layer | Crunch Factor | Panko Breadcrumbs or Crushed Cereal |
Temperature control is key. Keep your oil at 375°F. Don’t overcrowd the pan. Drain your chicken on a wire rack to keep it crisp.
The Science Behind Double-Dredging Method
Unlocking the secret to ultra-crispy chicken tenders starts with mastering the double-dredging technique. This method transforms ordinary chicken into a culinary masterpiece. It creates a perfectly crispy chicken coating that will make your taste buds dance.
The magic of double-dredging chicken lies in its strategic layering process. Unlike traditional breading methods, this technique creates a dramatically thicker and crunchier exterior. It locks in moisture and flavor.
First Dredge Technique
Your first dredge is crucial for creating a perfect base. Here’s how to nail it:
- Pat chicken tenders completely dry
- Season all-purpose flour with salt and pepper
- Coat tenders evenly, pressing flour firmly
Second Coating Process
The second coating is where breading chicken tenders becomes an art form. Create a wet mixture that helps the final breading adhere perfectly:
- Dip floured tenders in egg wash
- Add a splash of buttermilk for extra adhesion
- Incorporate potato starch for enhanced crispiness
Resting Period Importance
Patience is key in achieving the ultimate crispy chicken coating. Let your breaded tenders rest for 5-10 minutes before frying. This crucial step allows the breading to set. It significantly reduces the chance of it falling off during cooking.
“Perfection requires time and technique” – Professional Chef’s Secret
| Technique | Improvement Percentage |
|---|---|
| Double Dredging | 30% Increase in Crust Thickness |
| Buttermilk in Egg Wash | 25% Better Coating Adhesion |
| Potato Starch Addition | 40% Reduction in Sogginess |
Pro tip: Ensure your chicken is bone dry before starting the double-dredging process to guarantee maximum crispiness!
Oil Temperature Control Techniques
Mastering frying oil temperature is key to making crispy chicken tenders. Professional chefs know that the right temperature turns regular chicken into a golden, crunchy treat.
When frying chicken tenders, the oil temperature is crucial. It should be between 325°F and 350°F for the best crispy exterior.
“Temperature control is the secret weapon in creating restaurant-quality fried chicken” – Professional Chef
Essential Temperature Monitoring Tools
- Digital infrared thermometer
- Heavy-bottomed pot or dutch oven
- Candy/deep-fry thermometer
- Instant-read meat thermometer
Optimal Frying Temperature Guidelines
| Frying Stage | Temperature Range | Recommended Action |
|---|---|---|
| Initial Oil Heating | 325°F – 350°F | Maintain consistent heat |
| First Chicken Batch | 315°F – 325°F | Monitor and adjust heat |
| Temperature Drop | Below 300°F | Remove chicken, reheat oil |
Pro tip: Always fry chicken tenders in small batches to prevent significant temperature drops and ensure consistent crispiness.
Using a reliable thermometer is essential. It helps you keep the oil at the right temperature. If the temperature changes, your chicken won’t be crispy. Stay within the recommended range for perfect results every time.
The Two-Temperature Frying Method
Mastering the art of double frying chicken is key to making crispy fried chicken. This method turns simple chicken tenders into crispy wonders that wow everyone.
The two-temperature frying method is a game-changer for perfect fried chicken tenders. It gives you a crispy outside and a juicy inside.
Initial Low-Temperature Fry
For the first fry, follow these important steps:
- Heat oil to 325°F
- Fry chicken tenders for about 4 minutes
- Look for a light golden color
- Remove tenders and drain on an elevated wire rack
High-Temperature Final Fry
The second fry is when the magic happens for that perfect crispy texture:
- Increase oil temperature to 375°F
- Fry tenders for 2 minutes
- Aim for a deeper, darker golden color
- Ensure internal temperature reaches 165°F for food safety
“The secret to exceptional fried chicken lies in patience and precise temperature control.” – Professional Chef
Temperature Management Insights
| Frying Stage | Temperature | Duration | Expected Result |
|---|---|---|---|
| First Fry | 325°F | 4 minutes | Light golden, partially cooked |
| Final Fry | 375°F | 2 minutes | Crispy, dark golden exterior |
By using this two-temperature frying method, you’ll make your chicken tenders amazing. They’ll be crispy and delicious every time.
Proper Draining and Resting Procedures
Draining fried chicken right is key to keeping it crispy. The moments after frying are crucial. They help keep your chicken tenders golden and crunchy.
Here are expert tips for resting fried chicken:
- Place chicken on a wire rack over a paper towel-lined baking sheet
- Ensure air circulates around each tender to avoid soggy bottoms
- Let chicken rest for 3-5 minutes after frying
The resting time does a lot for crispy chicken. It lets excess oil drain and the coating set. This makes the outside incredibly crisp.
“Patience is key when achieving the perfect crispy chicken tender” – Professional Chef Recommendation
Don’t stack your chicken tenders while they drain. This keeps them crispy and prevents steam from softening the coating.
Pro tip: If cooking multiple batches, use a cooling rack in a warm oven (around 200°F). It keeps earlier batches crisp while you cook more.
By following these steps, your fried chicken will go from good to amazing. You’ll get a satisfying crunch with every bite.
Storage and Reheating Methods
To keep your chicken tenders crispy, you need to store and reheat them right. This way, you can enjoy them for days after you first make them.
Short-Term Storage Solutions
Here’s how to store crispy chicken tenders:
- Put them in an airtight container right after they cool down
- Refrigerate them within two hours of cooking
- They’ll stay good in the fridge for 3-4 days
“The key to maintaining crispy texture is proper storage and careful reheating techniques.”
Reheating for Maximum Crispiness
Here are ways to keep your chicken tenders crispy when you reheat them:
| Reheating Method | Temperature | Time | Crispiness Level |
|---|---|---|---|
| Air Fryer | 360°F | 5-7 minutes | Highest |
| Conventional Oven | 375°F | 10-15 minutes | Good |
| Toaster Oven | 400°F | 10-15 minutes | Moderate |
Make sure your chicken tenders heat up to 165°F for safety. Don’t use the microwave, as it can make them soggy.
Long-Term Storage Tips
For longer storage of chicken tenders:
- Freeze them in containers made for the freezer
- Use them within 3-4 months for the best taste
- Thaw them in the fridge before you reheat
Tip: Use a wire rack when reheating to keep them crispy. This lets air circulate and keeps them crunchy.
Common Mistakes to Avoid When Frying
Getting perfect fried chicken tenders means avoiding key mistakes. These errors can mess up your cooking. Knowing what to avoid helps you make crispy, tasty chicken every time.
- Oil Temperature Management: The right oil temperature is key. Keep it between 300 to 325 degrees Fahrenheit. This prevents greasy or undercooked chicken.
- Overcrowding Prevention: Don’t overcrowd your pan. Fry in batches. This lets each tender cook evenly and stay crispy.
- Breading Techniques: Use cornstarch in your breading. It makes the chicken crispy and keeps it dry.
Good fried chicken tips stress the need for proper prep and cooking. One big mistake is using the wrong oil. Stay away from olive oil because it has a low smoke point and can taste bad.
“The secret to perfect fried chicken tenders lies in patience and precision.” – Professional Chef
Draining your chicken right is important for a crispy outside. Use a wire rack over a sheet pan instead of paper towels. Paper towels can trap steam and make your chicken soggy.
| Mistake | Solution |
|---|---|
| Incorrect Oil Temperature | Use a thermometer, maintain 360°F |
| Overcrowding Pan | Fry in small batches with space between pieces |
| Improper Draining | Use elevated wire rack for air circulation |
Perfect fried chicken tenders are an art that needs practice and focus. By avoiding these common mistakes, you’ll improve your cooking. You’ll also impress everyone at dinner.
Equipment and Tools for Perfect Results
Creating crispy chicken tenders is more than just skill. You need the right tools to make your cooking better. Both professional chefs and home cooks know that the right tools can turn ordinary chicken into amazing tenders.
Quality tools for crispy chicken mean delicious results every time. Let’s look at the key equipment you need to get your chicken tender game on point.
Essential Kitchen Equipment
- Heavy-bottomed pot or dutch oven for even heat distribution
- Wire rack with drip tray for perfect drainage
- Long-handled tongs for safe chicken handling
- Large mixing bowls for dredging
- Deep-fry basket or spider strainer
Temperature Monitoring Tools
Getting the temperature right is key when frying chicken tenders. The right tools can make all the difference between soggy and crispy.
- Instant-read digital thermometer
- Infrared thermometer for non-contact readings
- Candy thermometer for oil temperature tracking
“Precision is the secret ingredient to perfect chicken tenders.”
When picking your tools, look for ones that help control temperature and are safe to use. An electric skillet or dedicated deep fryer is a great choice for home cooks aiming for restaurant-quality chicken tenders.
Pro Tips for Equipment Selection
- Choose a thermometer that reads temperatures between 350°F and 375°F
- Select heat-resistant utensils
- Invest in quality non-stick or cast-iron cookware
With the right tools, you’ll be on your way to making crispy, golden-brown chicken tenders. They’ll impress your family and friends.
Conclusion
Your journey to make the perfect crispy chicken tenders begins with technique and passion. Each batch is a chance to get better at cooking. You now have the knowledge to turn simple ingredients into amazing meals at home.
Creating perfect fried chicken tenders takes practice, precision, and patience. By using the techniques from this guide, you can get crispy outsides and juicy insides. Remember, controlling temperature, seasoning, and preparation are crucial for great chicken tenders.
These chicken tenders are not only tasty but also healthy, with 29 grams of protein and only 288 calories. Your new skills will impress everyone and offer a healthier choice than store-bought. Keep trying different seasonings, breadcrumbs, and cooking methods to make each batch special.
Cooking is a never-ending learning process. See each try as a chance to get better, even if it doesn’t work out at first. Your quest for crispy chicken tenders is about having fun, being creative, and sharing great food with loved ones.
FAQ
What’s the difference between chicken tenderloins and chicken breasts?
Chicken tenderloins are softer and found under the breast. If using breasts, cut them into strips and remove the tendon. This makes them tender.
How can I ensure my chicken tenders stay crispy?
For crispy tenders, mix flour and starches in the dredge. Add water to make the mix craggy. Let the breaded tenders rest before frying. Use the double-frying method and drain on a wire rack. This prevents them from getting soggy.
What ingredients make chicken tenders extra crispy?
Key ingredients are flour, potato starch, and cornstarch. Potato starch makes the batter rigid. Cornstarch stops gluten from forming. Baking powder adds air bubbles for crispiness.
What’s the best way to season chicken tenders?
Use kosher salt, black pepper, and spices like garlic and onion powder. Season the chicken before dredging. You can also add paprika and cayenne pepper to taste.
What oil temperature is best for frying chicken tenders?
Fry at 325°F for 4 minutes until lightly golden. Then, increase to 375°F for 2 minutes to crisp up. Always check the chicken reaches 165°F for safety.

